2.9K
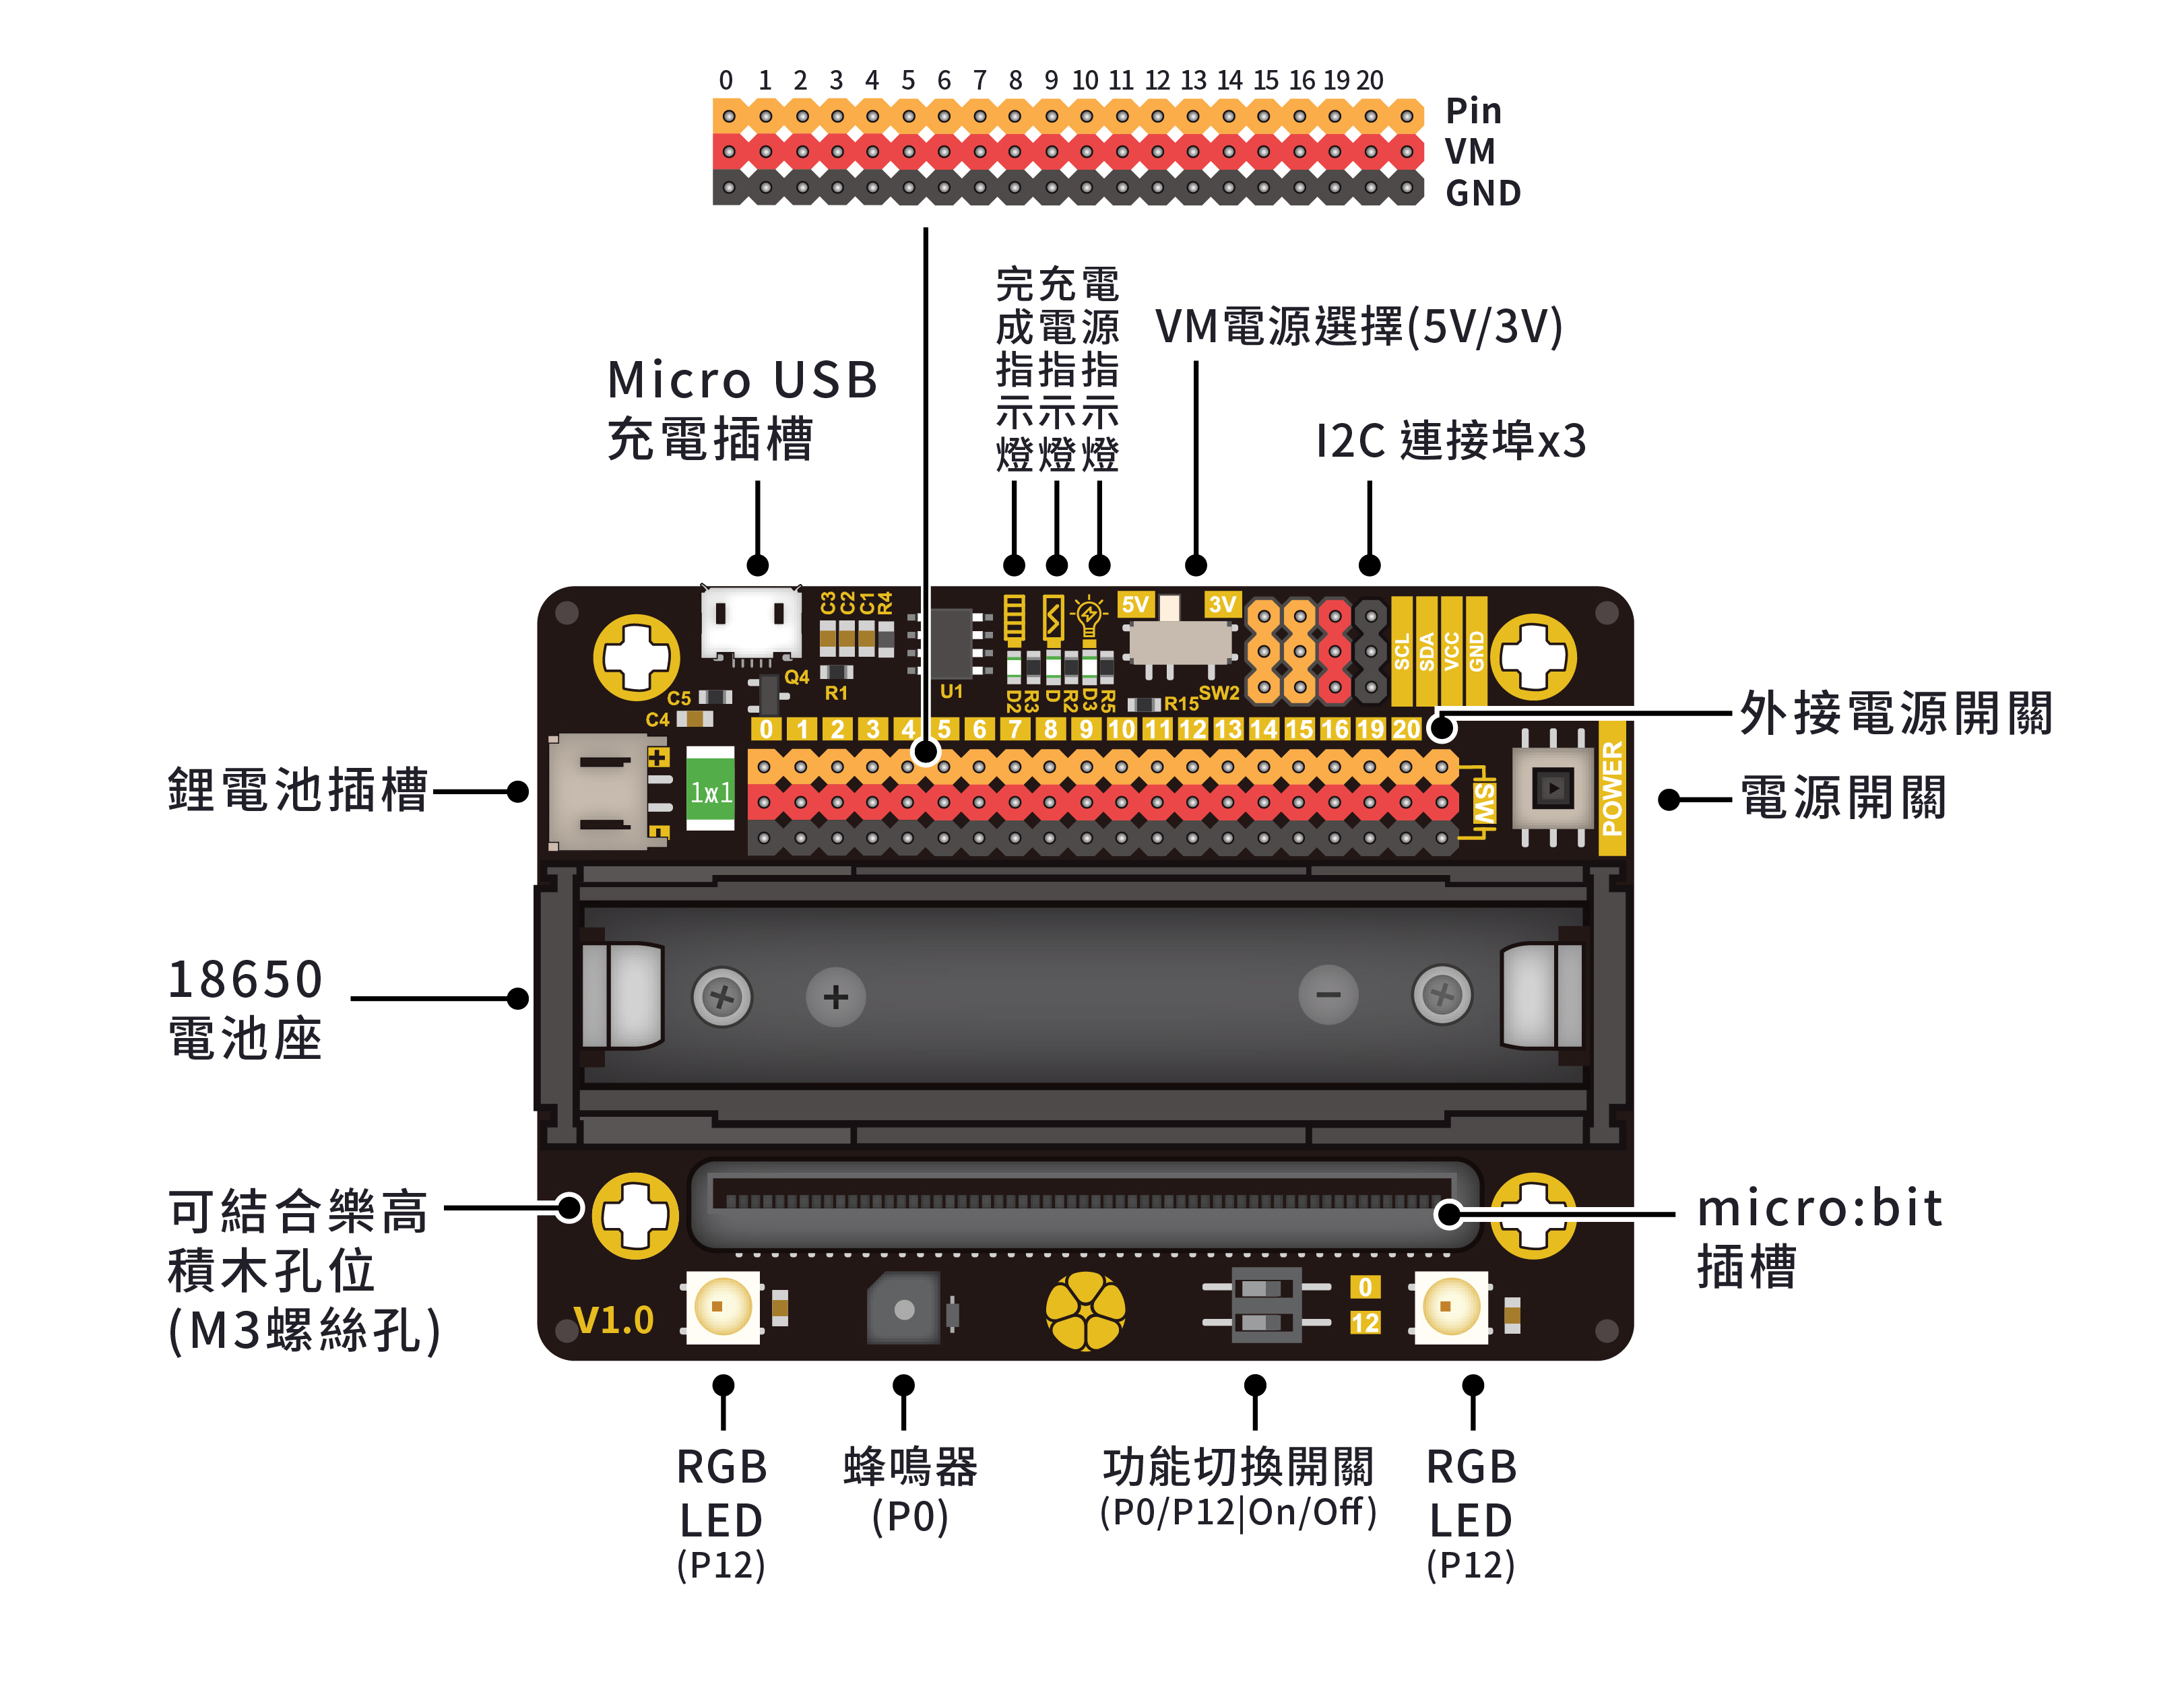
MbitBot Lite示意圖 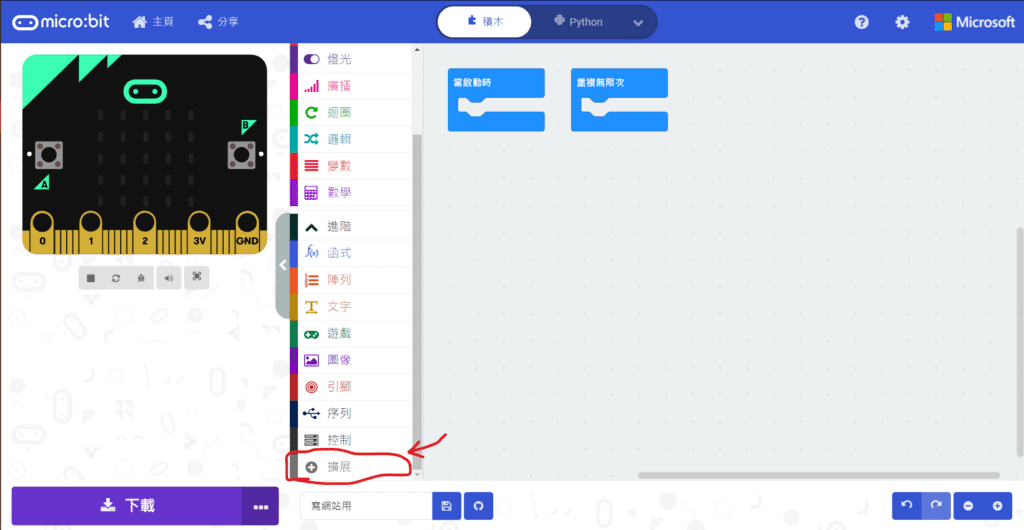
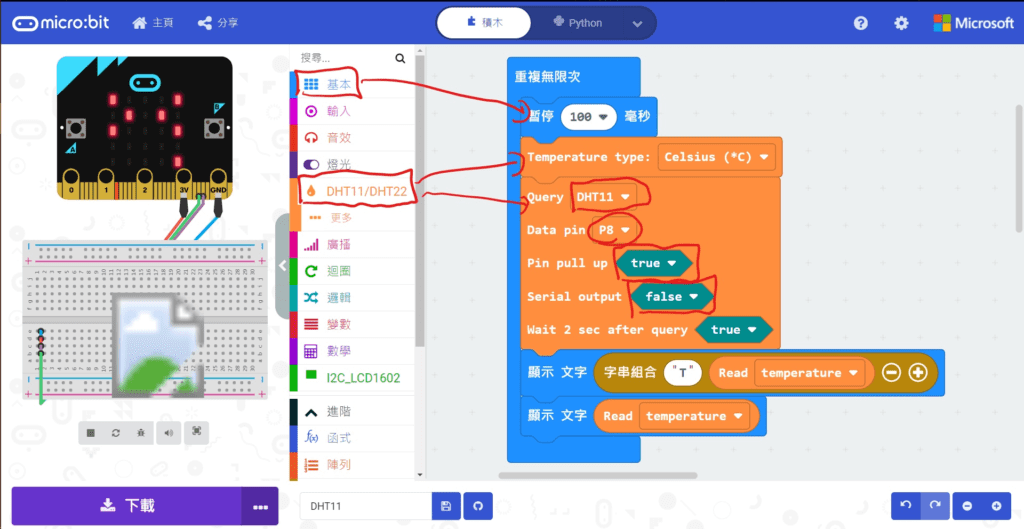
microbit DHT11 程式碼
目錄
使用設備:
- Microbit
- DHT11(溫溼度感測模組)
- MbitBot Lite擴充版
步驟一
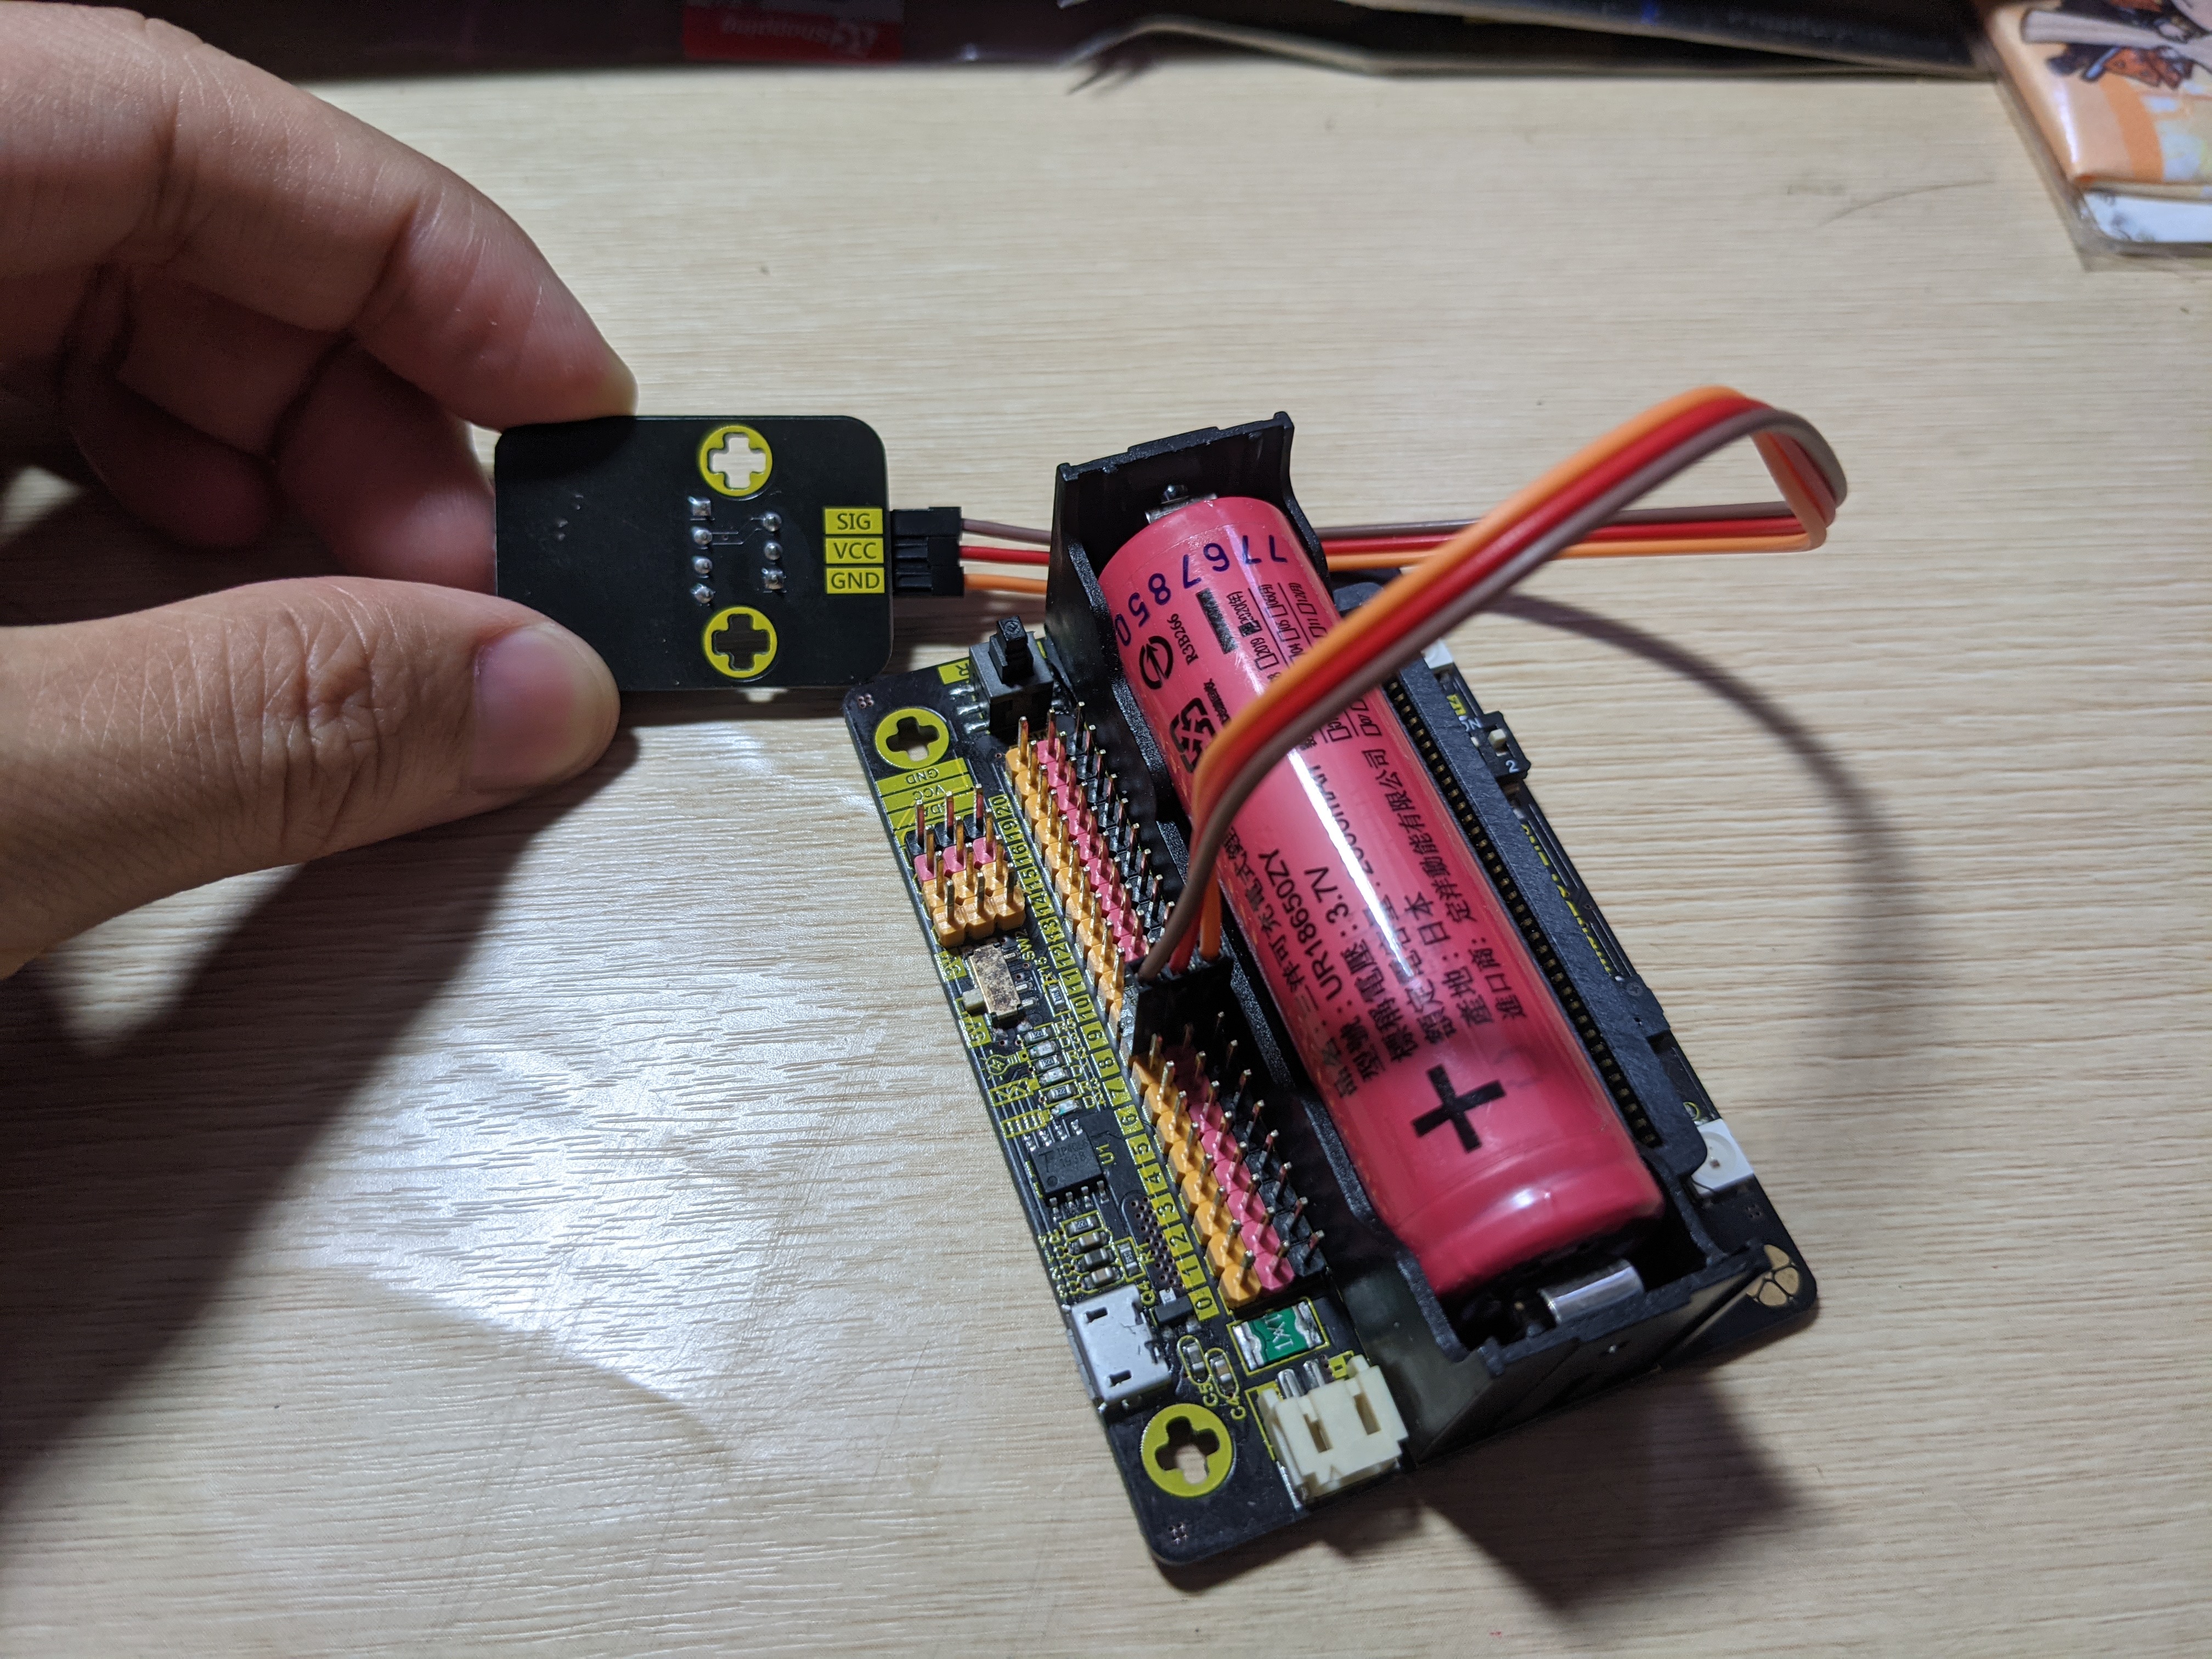
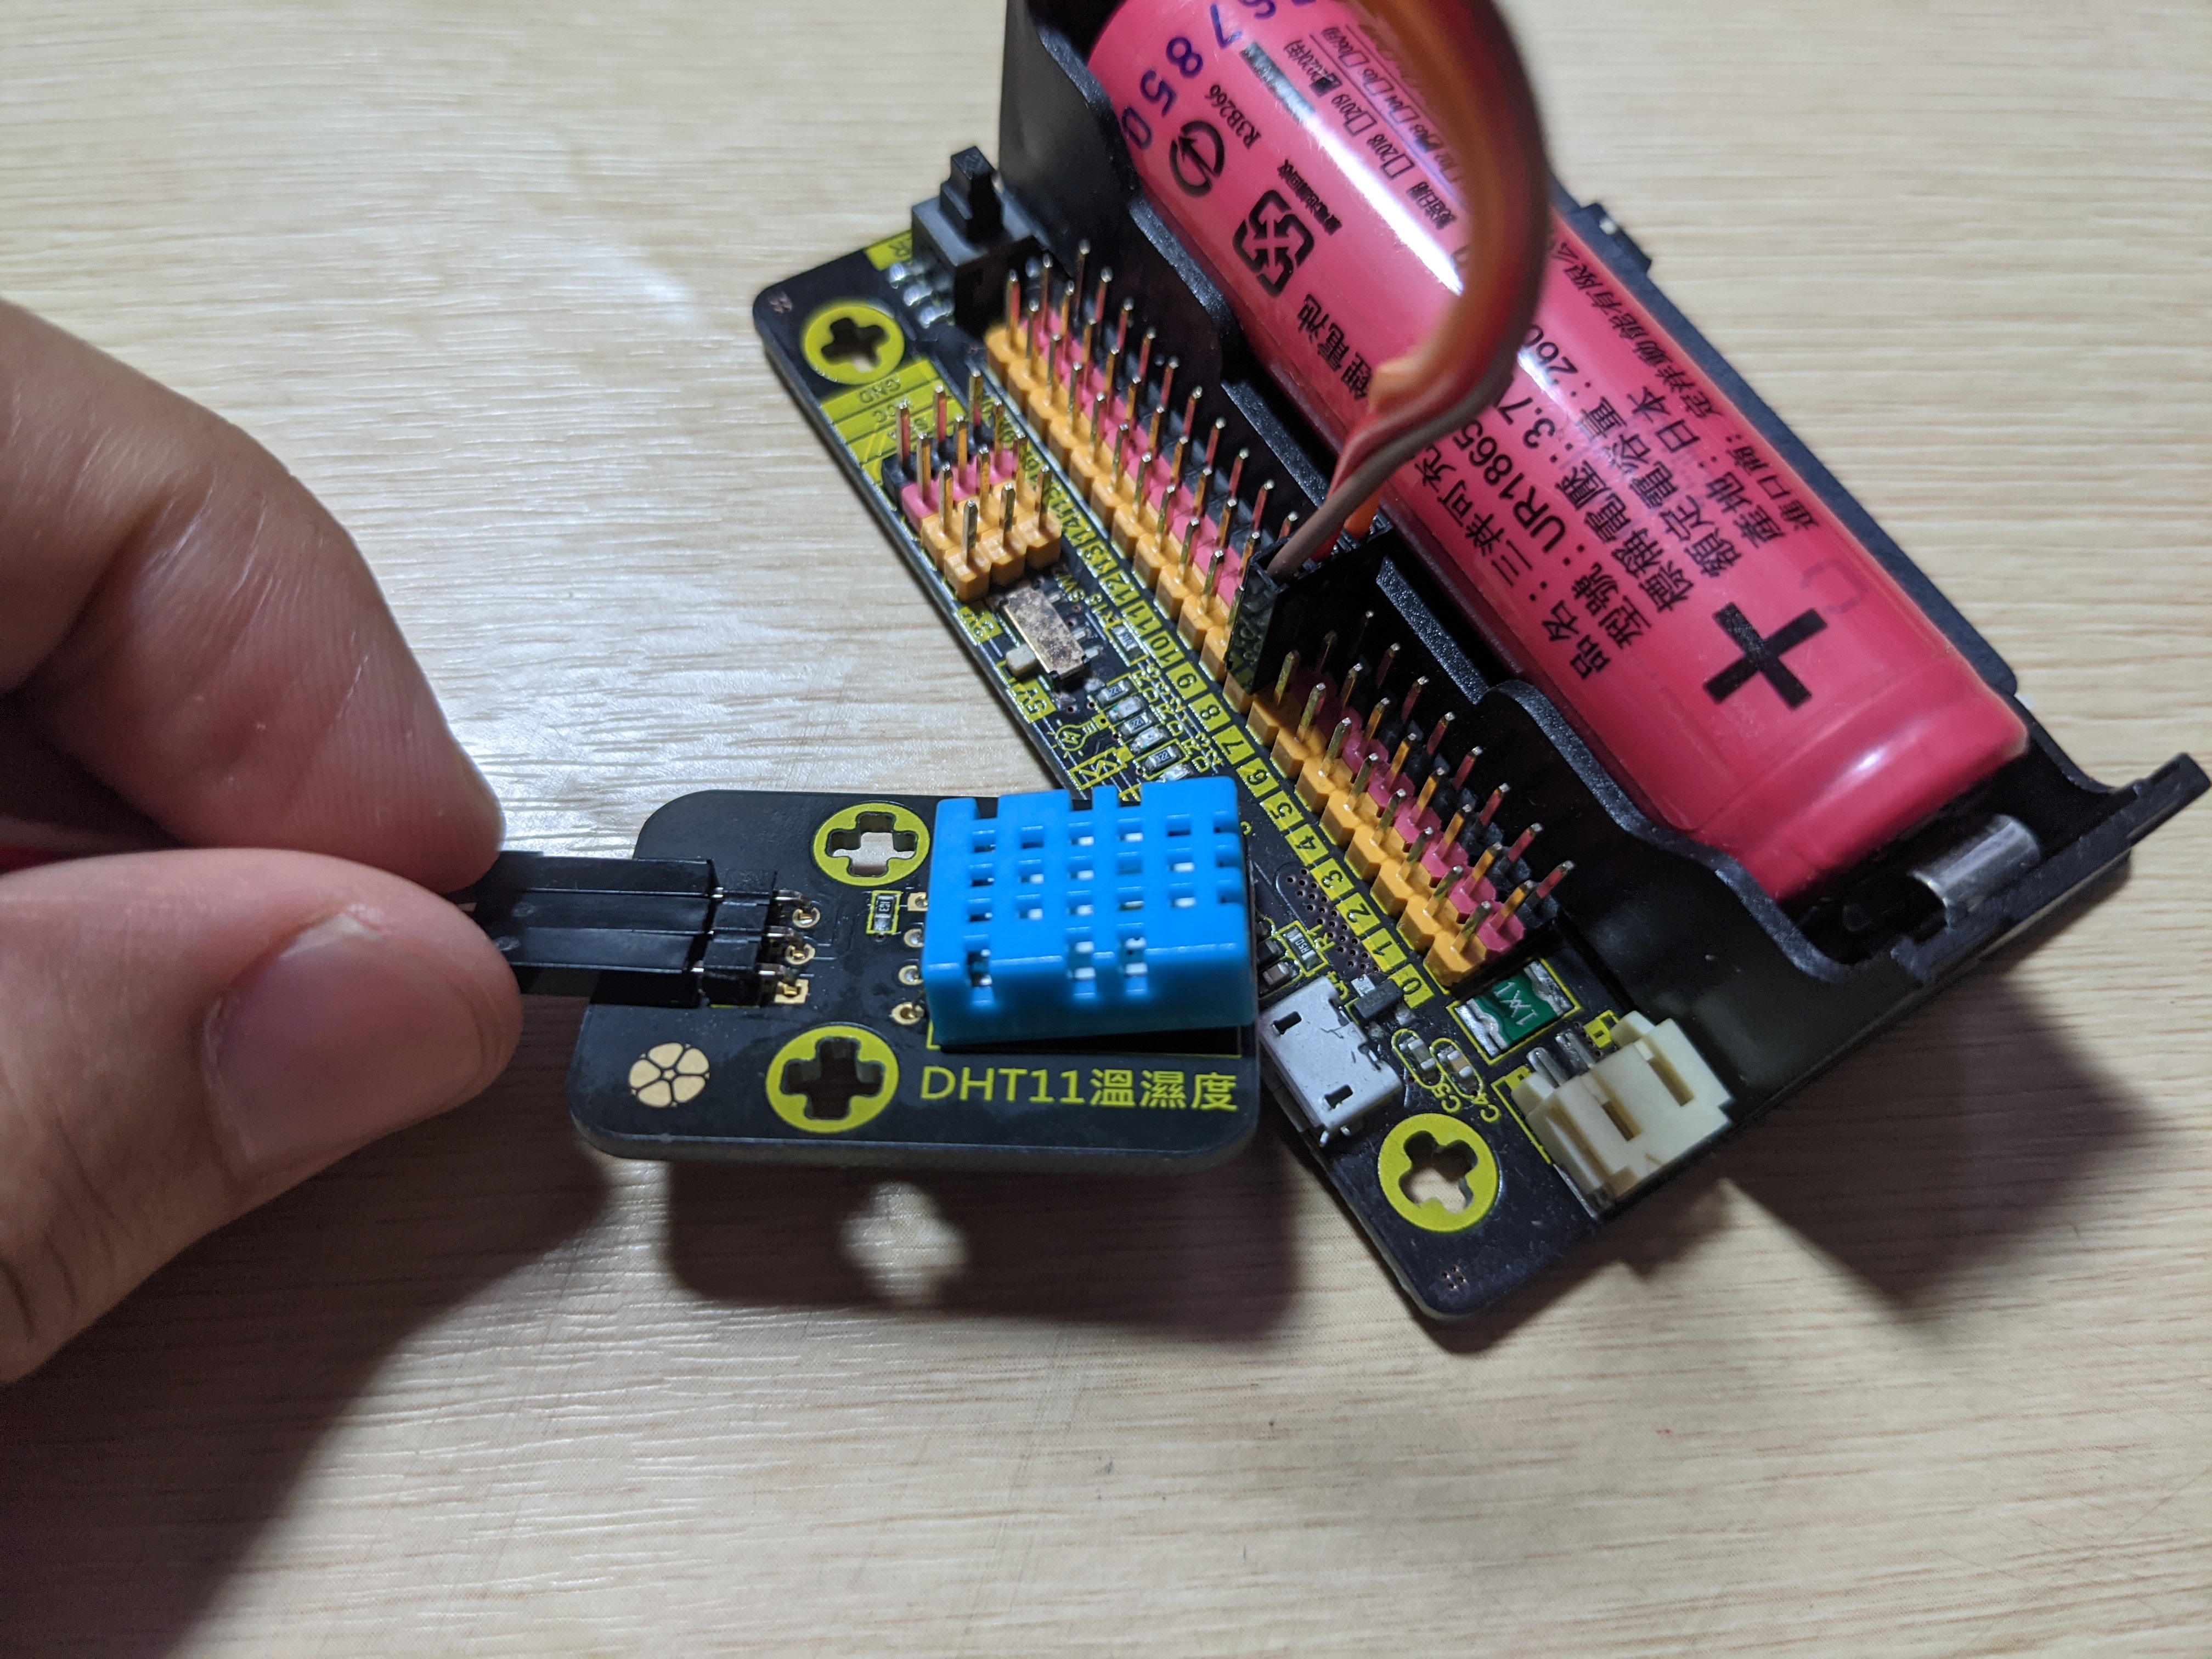
將DH11溫溼度感測模組接在第8隻腳,SIG接在Pin(黃色那排),VCC接在VM(紅色那排),GND接在GND(黑色那排)

步驟二
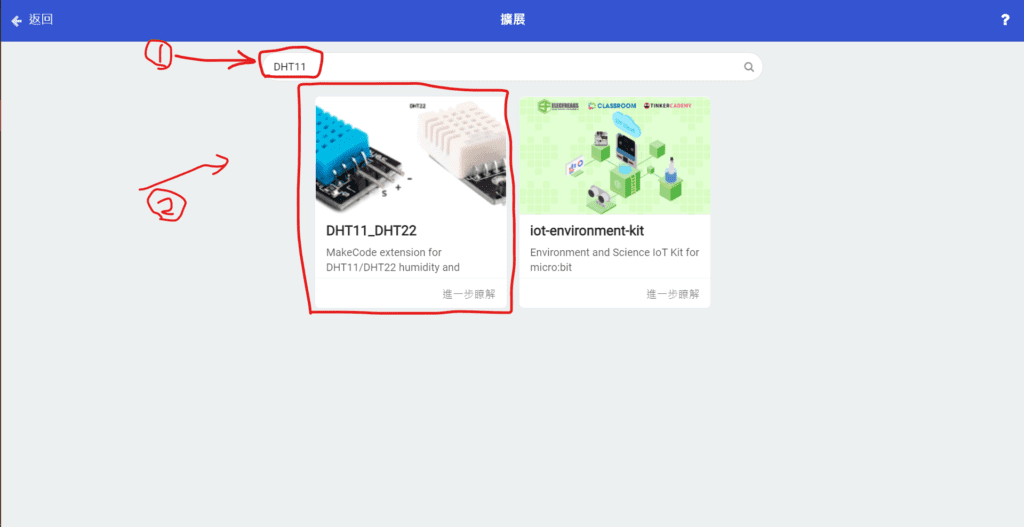
先新增DHT11的擴充程式,其原始碼GitHub在pxt-DHT11_DHT22


步驟三
Data pin請選擇你插的那隻腳,目前是插在第8隻腳(P8)
pin pull up選擇true
Serial output選擇false
透過Read temperature讀取DHT11的溫度值

